Climbing up on a roof to get measurements can be a hazardous and time-consuming task.
And while accurate measurements are critical once you’re at the point of bidding a job or ordering materials, sometimes you just need a rough idea of what you’re working with. Or sometimes you have an anxious homeowner asking for a ballpark estimate and you don’t want to leave them hanging.
If that’s the case, you can get a decent idea of the roof’s square footage from the ground if you know a few tricks. Let’s walk through them step by step.
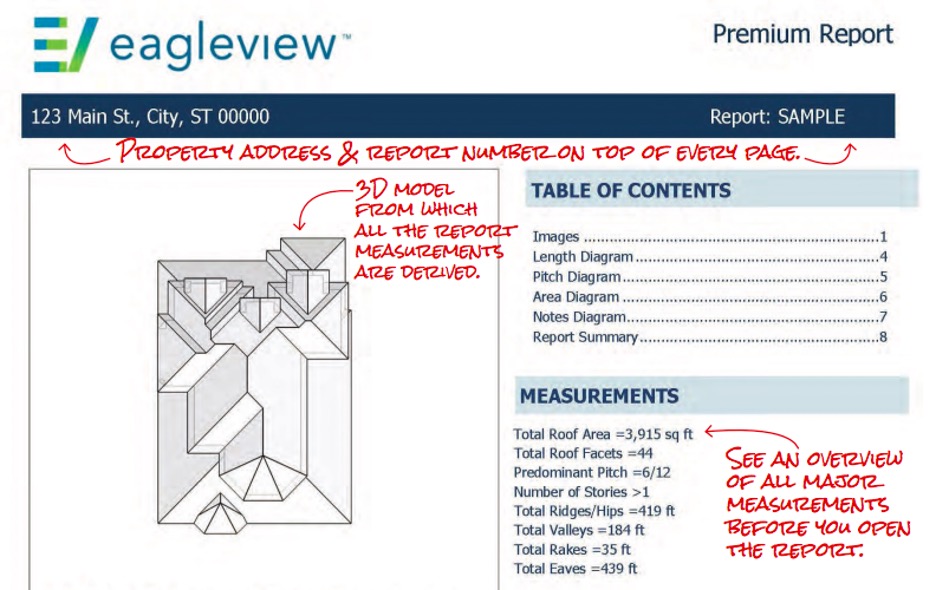
Author’s note: If you don’t have the time to take measurements by hand, there is another way. You can pull an EagleView report on the property. The report will give you all the measurements you need, plus calculations like area, roof pitch, and waste factor — all without ever leaving the ground.
A step-by-step guide for measuring a roof from the ground
We’re going to start at the very beginning to walk you through the process of estimating roof measurements from the ground.
Step 1: Draw a quick diagram of the property
The first thing to do when measuring a roof from the ground is to draw a quick diagram of the property. This ensures you won’t accidentally miss a section and leave something out of your calculations. Plus, it gives you a place to record your measurements as you go along.
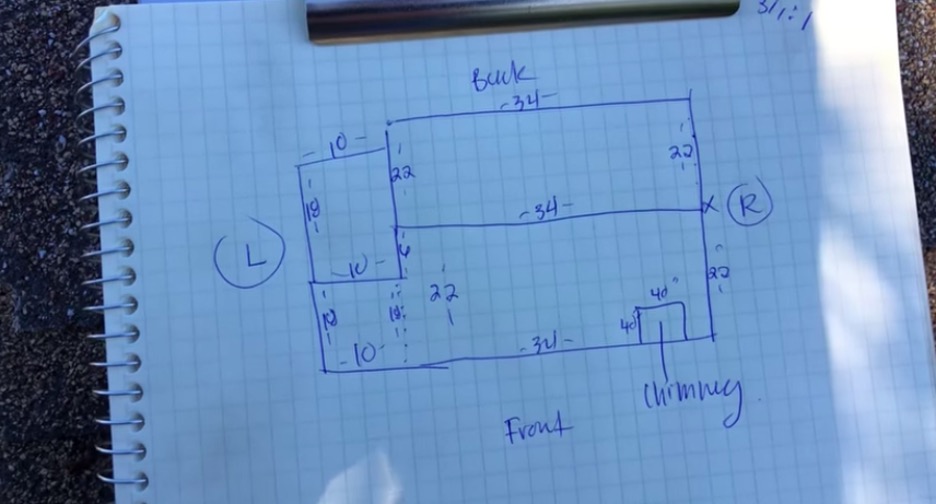 Image credit: Rox Roofing
Since you’re working from the ground instead of up on the roof, it’s ok for this to just be a rough sketch of the overall shape of the house. Just make sure to label your diagram with basic reference points like front, back, left, and right. This helps to make sure that you record the measurements in the right place.
Step 2: Measure the footprint of the house
The footprint of a house is a bit different from square footage because it refers to the perimeter of the exterior walls at ground level.
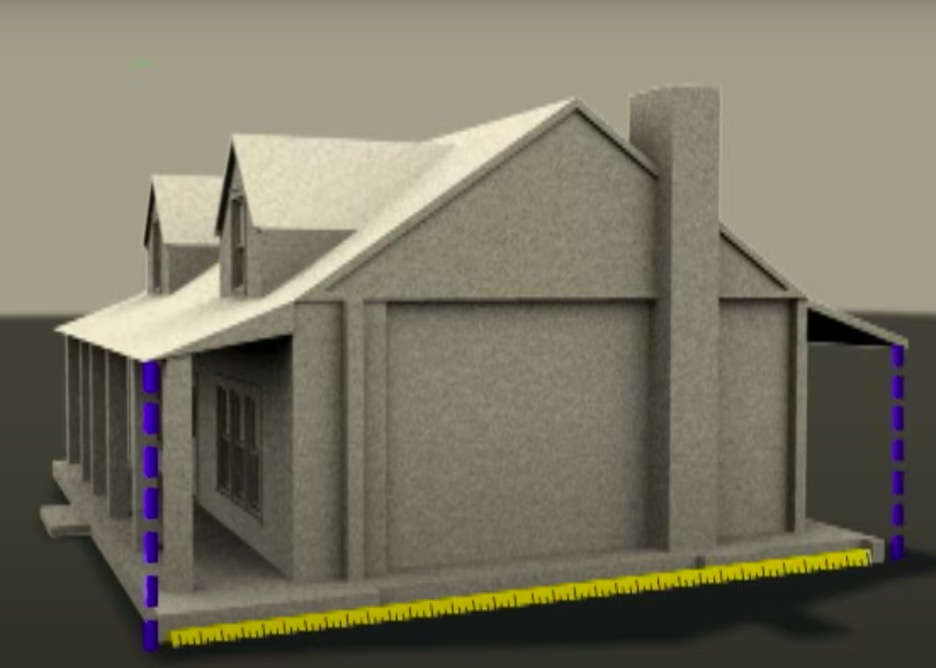 Image credit: Aluminum Lock Roof Inc
Square footage, on the other hand, includes the entire area of the house within the walls, including additional stories. Since you only need one roof regardless of whether it’s a one-story or three-story house, the footprint is a more accurate starting point than square footage.
To measure the footprint, use a tape measure or wheel and measure the length of each side of the house. Be sure to measure all the way out to the roof overhang, as you can see in the picture above, since that’s where the roof ends.
Also, make sure to include any additions to the house like sunrooms, garages, or other bump-outs. As you measure, record your findings on your diagram so that you know which measurement corresponds to which side. This will be important in the next step.
Step 3: Calculate the area and square footage of the roof
Once you have all your measurements, you’re going to use them to calculate the area. If you remember from math class, the area of a rectangle is found by multiplying the length of a space by the width of a space. This gives you the total area in between the sides.
 Image credit: nachi.org
In the case of a roof, let’s say the house has two long sides that measure 40 feet (this is the length), two short sides that measure 20 feet (the width), and a 10 x 10 addition on the back. To find the area of each space, you would do the following calculations:
40 feet x 20 feet = 800 square feet
10 feet x 10 feet = 100 square feet
Then you would add the separate spaces together to get the total area or square footage of the roof. In this case, it would be:
800 square feet + 100 square feet = 900 square feet
Step 4: Convert the square footage into roofing squares
A roofing square is the common unit of measurement in the roofing industry used to measure and price roofing jobs. It’s related to the square footage, but it’s a bit different.
 Image credit: vecteezy.com
A roofing square refers to a 10 x 10 area (or square) on the roof, which is the equivalent of 100 square feet. Roofers use this measurement to quickly determine how much material will be needed to do the job, as it takes about 3 bundles of shingles to cover one roofing square. So let’s go back to our example of a 900 square foot roof. To convert this to roofing squares, you’re going to divide 900 by 100. This comes out to 9 roofing squares.
Step 5: Calculate the slope of the roof
The next piece of information you need is the slope of the roof. Finding the slope is important because so far, we’ve only figured out how big the roof would be if it were flat across the footprint of the house. Since residential roofs are usually sloped, creating more space on the roof surface than if it were flat, you need to account for the extra square footage.
 Image credit: Roofing Calculator
As you can see in the image above, finding the slope is based on the geometry of a right triangle. The slope is the longest side of the triangle (or the hypotenuse), and the rise and run make up the other sides, forming a right angle. When finding the slope, the run is always going to be based on 12 inches. So you just need to determine the rise and you’ll be all set.
There are a few ways to do this without getting all the way up on the roof. The first is to measure from inside the attic if you have access. Here’s how:
- Gather up a level, a tape measure, and a pencil.
- Measure 12 inches from one end of the level and make a mark.
- Place the end of the level against the bottom of a roof rafter and hold it perfectly level, using the bubbles as a guide.
- Measure vertically from the 12-inch mark on the level straight up to the underside of the rafter. This is the number of inches the roof rises in 12 inches and is called the slope.
Let’s say you measure 4 inches from the level to the rafter. This means that the roof rises 4 inches for every 12 inches of space. And since slope is expressed as a ratio, the slope of this roof would be expressed as 4 in 12 or 4:12.
Step 6: Multiply the slope factor by the number of roofing squares
Ok, so now we know the slope of the roof but we need to find the “slope factor” to figure out how many more roofing squares we need. Fortunately, lots of roofing companies share this information online. You can see the chart above from Everlast Roofing as an example.
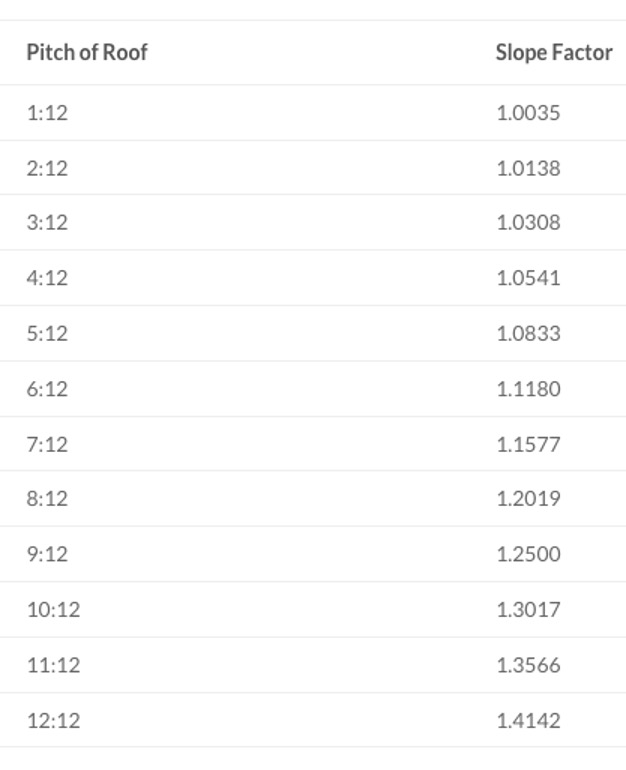 Image credit: Everlast Roofing
So, going back to our roof with a 4:12 slope, you can see that the corresponding slope factor is 1.0541. To find what this means in terms of roofing squares, you would do the following calculation:
9 roofing squares x 1.0541 = 9.4869 roofing squares
Step 7: Don’t forget to add in the waste factor
The last thing to take into consideration is the waste factor. This accounts for material that gets overlapped in hips and valleys, as well as material that gets cut off around flashings, penetrations, and gable ends.
If it’s a relatively simple gable roof, most roofing contractors typically add 10-15% to the total square footage to account for waste factor. If it’s a more complicated hip roof, the waste factor can be higher.
In fact, we once worked with a company that had a job with a shocking 41% waste factor. It was so shocking, in fact, that they didn’t believe it when the EagleView report came in with the numbers. But this was no ordinary roof and there were things that jumped off the page when looking at the report:
- Structure Complexity: Complex (on a scale of Simple-Normal-Complex)
- Areas per Pitch: Nearly 83% of the roof, or 2,364 square feet, had a pitch of 3/12
- Waste Calculation: Suggested waste percentage of 41%, or 33.66 squares
The suggested waste factor of 41% grabbed the attention of the salesperson in charge of submitting a bid. They balked at such a high number, knowing it would result in a higher bid and a lesser chance of winning the job.
A tough decision had to be made: either to go with the 41%, or to use their judgement to lower the number. After much deliberation, the salesperson decided to underbid the job based on a lower waste factor. After all, there’s no way the waste could actually be as high as 40%, right?
In fact, it was. After the job was canceled, the company’s production team reviewed the report and the property itself and determined that EagleView’s suggested waste factor was accurate, especially since it was to be a metal roof.
Going back to our example, though, you would add the standard waste factor of 10% since it’s a pretty simple roof. The calculation would look like this:
9.4869 roofing squares x .10 = .94869
Then you add that to the amount of roofing squares like this:
9.4869 + .94869 = 10.43559
Rounding up, you’ll need 11 roofing squares to get the job done based on measurements from the ground.
Step 8: Confirm measurements before ordering materials
As we mentioned, measuring from the ground is a good way to get a rough idea of what you’re dealing with when approaching a roofing project. It’s also a good way to give an anxious homeowner a ballpark estimate.
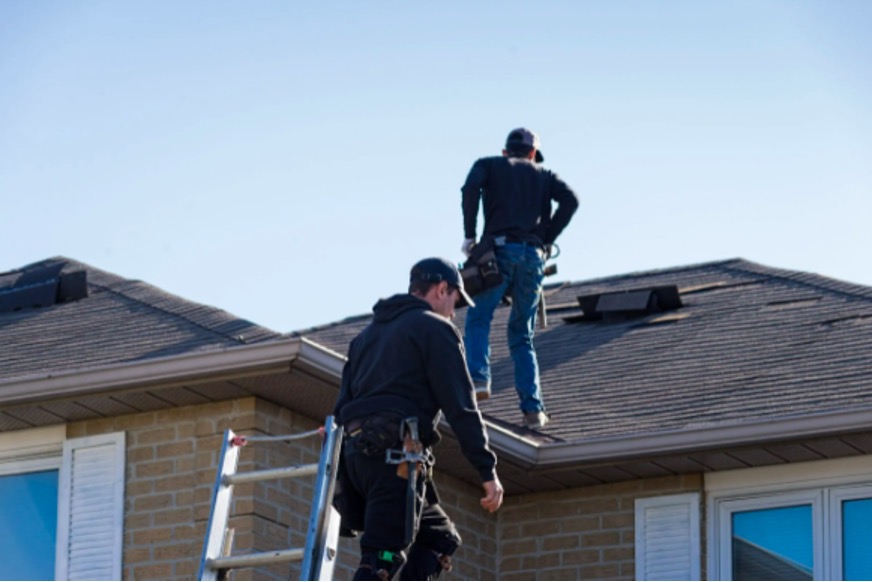 Image credit: stonescapesteelroofing.com
What it’s not good for, however, is accurately ordering roofing materials or bidding jobs. As you can imagine, there’s a lot that can be missed with this method since you’re not actually getting a look at the roof first.
You can end up paying way too much for material and losing money on the job. Or under-bidding a job and having to work for peanuts. So before you get to this step, you’ll want to confirm your estimate by either getting up on the roof or ordering a virtual report from a company like EagleView.
If you’re measuring by hand, check out this article that walks you through finding square footage step by step. If you’re planning to order a virtual report, it’s as easy as inputting an address and sitting back. We’ll have a report out to you usually within the hour.
Our measurements are based on patented oblique image capture technology that delivers 4x the detail of standard aerial imagery and 70x that of satellite imagery.
Want to sell more roofs? EagleView can help you
How contractors sell more (and faster) using EagleView
With EagleView, you don’t have to climb up on the roof to get measurements. You also don’t have to do the calculations by hand. Instead, EagleView’s report gives you all the information you need to get accurate estimates to customers right away.
Take the case of ARAC Roofing, for example. They began using EagleView reports to replace manual calculations and measurements a few years ago.
Justin Dover, Chief Insurance and IT Officer, explains the rationale behind their decision: “When you're calculating 36 faces or even more than that, you go from being a roofer to a mathematician. It’s a waste of resources that could better be used in other areas.”
So far, it’s working. Since making the switch, ARAC’s business has averaged an astonishing 40% year-over-year growth.